Stop listening to the influencers telling you that you need a $500 linen set or a professional lighting kit to look decent in a photo. It’s a lie designed to make you feel like your current wardrobe is the problem, when usually, it’s just a matter of how the light hits a poorly constructed seam. I spent two years in a basement studio pinning hems for brides who were panicking because their “dream dress” looked like a sack on camera, and I learned one thing: knowing how to photograph well in clothes has almost nothing to do with what you buy and everything to do with how the fabric behaves when you move.
I’m not here to sell you a new aesthetic or a capsule wardrobe collection. I’m going to show you how to use what you actually own by understanding weight, texture, and the way a simple hem adjustment can change your entire silhouette in a shot. We are going to talk about why certain fabrics bunch up under a flash and how to pick colors that don’t wash you out, all without spending a penny more than a trip to the tailor.
Understanding How to Photograph Well in Clothes
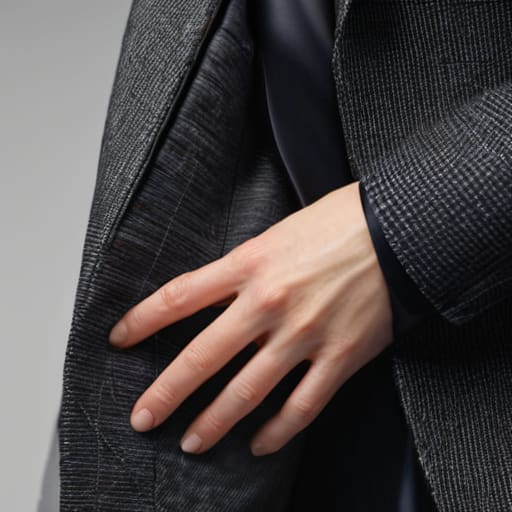
The biggest mistake people make when trying to look good on camera is thinking the lighting or the pose is the problem. Usually, it’s the fabric. If you’re wearing a thin, synthetic jersey that’s fighting a losing battle against your skin, no amount of professional lighting is going to save you. You need to understand how clothing texture in photography actually works. A heavy wool blazer or a structured linen shirt holds its own shape against the lens, whereas a cheap, flimsy polyester blend will just cling to every accidental wrinkle or seam that’s pulling too tight.
When you’re planning your look, stop focusing on “trends” and start looking at the silhouette. If you want to master outfit styling for portraits, you have to account for how the camera flattens depth. A garment with a bit of weight or a clean, intentional seam will look expensive and deliberate, even in a candid shot. If a sleeve is too long or a waist is gaping, the camera will find that gap and highlight it like a neon sign. Don’t buy a new outfit to fix a bad photo; just ensure what you’re wearing actually stays in place when you move.
Key Things to Know
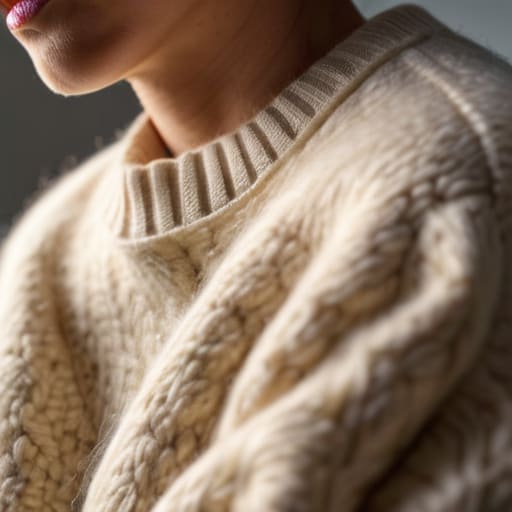
First, stop obsessing over the brand name on your tag and start looking at the clothing texture in photography. A cheap, thin polyester top might look fine in a mirror, but under a camera lens, it looks like shiny plastic. If you want to look expensive without actually being expensive, lean into fabrics with some weight or a visible grain—think heavy linen, boiled wool, or a sturdy cotton drill. These materials catch the light in a way that gives your silhouette structure, rather than just clinging to every seam and wrinkle.
Second, you need to understand that how you stand matters as much as what you’re wearing. Most people think they need a professional photographer to master posing techniques for fashion, but honestly, it’s just about managing volume. If you’re wearing an oversized blazer, don’t just stand flat to the camera or you’ll look like a rectangle. Create some negative space by putting a hand on your hip or slightly angling your shoulder. It’s about using your body to show the garment’s shape, not hiding it.
Practical Tips and Steps
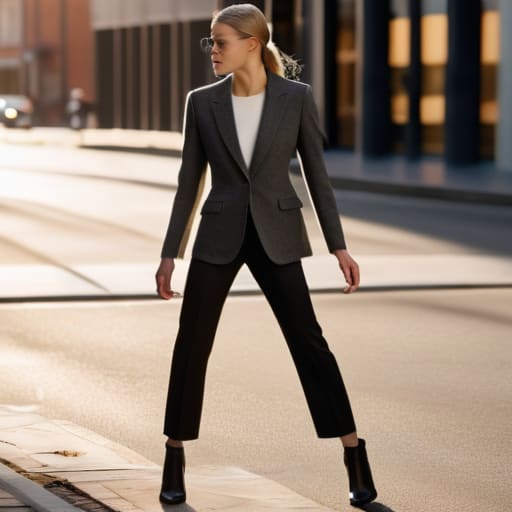
First, stop obsessing over your face and start looking at your silhouette. If you’re standing flat-footed like a mannequin, you’re going to look stiff regardless of what you’re wearing. Use slight posing techniques for fashion—think about shifting your weight to one leg or creating space between your arms and your torso. This prevents the fabric from bunching up in awkward places, especially if you’re wearing a heavier wool or a structured blazer. If the garment fits well at the shoulders, you’ve already won half the battle.
Second, pay attention to how light hits your fabric. If you’re wearing a flat, matte cotton, it might disappear into a dark background. You want to play with clothing texture in photography to give the image depth; a chunky knit or a silk slip catches light differently and makes the outfit look expensive, even if it’s from a charity shop. Finally, watch your angles. A shot taken from slightly above can hide a waistline that isn’t quite where you want it, while a lower angle can make a well-tailored trouser look absolutely incredible.
Common Mistakes to Avoid
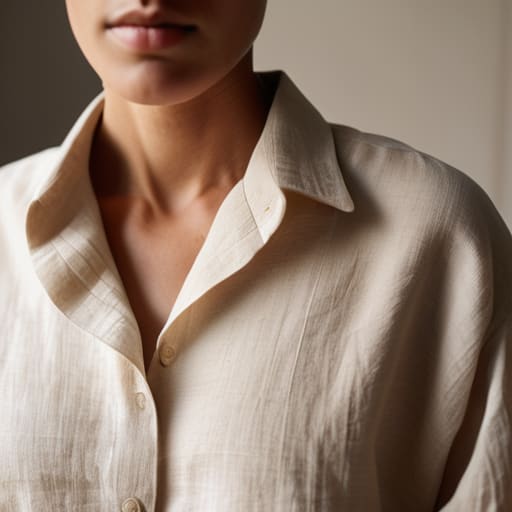
The biggest mistake I see is people treating a photo shoot like a shopping trip. You think a brand-new, stiffly starched shirt will make you look “polished,” but in reality, it just makes you look like you’re wearing a cardboard box. If the fabric doesn’t move with you, the camera will catch every awkward, static line. Instead of chasing trends, focus on clothing texture in photography; a heavy wool or a soft, lived-in linen catches light in a way that looks expensive and intentional, whereas cheap, shiny synthetics just scream “fast fashion” under a flash.
Another blunder is ignoring how much the lens lies. People spend hours on outfit styling for portraits only to realize they’ve chosen a pattern that vibrates or a color that washes them out entirely. If you’re wearing a tiny, busy print, the camera might turn it into a blurry mess. Also, stop fighting your silhouette. If a garment fits poorly in the shoulders or pulls at the hips, no amount of clever camera angles for outfit shots will save it. If it doesn’t fit the body, don’t blame the lighting—just take it to a tailor.
Final Thoughts
At the end of the day, please stop treating your camera like a judge and start treating it like a tool. You don’t need a new wardrobe to look better in a frame; you just need to understand how light hits your specific fabrics and how a simple hem adjustment changes your silhouette. Most of the “perfection” you see online is just a mix of good lighting and knowing which camera angles for outfit shots actually work for your body type. If the clothes fit properly, the camera does half the work for you.
Don’t get caught up in the madness of buying “photo-ready” pieces that fall apart after one wash. Focus on how clothing texture in photography adds depth—a heavy wool or a crisp linen will always photograph with more intention than a flimsy, synthetic blend that clings to every awkward seam. If you can master the basics of fit and a little bit of intentional posing, you’ll realize that looking good isn’t about the price tag; it’s about how the garment actually sits on your shoulders.
Five Ways to Stop Your Clothes From Looking Like a Mess in Photos
- Check your tension before you click. If you’re wearing a knit that’s pulling too tight across the chest or hips, the camera will catch every single horizontal stress line. It doesn’t look “form-fitting”; it looks like you’re wearing a size too small. If the fabric is straining, don’t try to pose through it—either size up or find a garment with more mechanical stretch.
- Beware of the “cheap fabric shine.” High-street polyester often has a specific, plastic-looking sheen that looks fine in a mirror but turns into a glaring, white-hot mess under a camera flash or direct sunlight. If you’re shooting in bright light, stick to matte natural fibers like cotton, linen, or wool. They absorb light instead of fighting it.
- Watch your seam alignment. A camera flattens a 3D body into a 2D image, which makes crooked seams look twice as obvious. If your side seams are twisting toward your stomach because the garment was poorly constructed, no amount of “angled posing” will save you. Check that your shoulder seams actually sit on your shoulders before you start shooting.
- Mind the “bulk factor” in layers. We love a layered look, but a camera can easily turn a well-styled outfit into a shapeless blob if the fabrics are too heavy. If you’re wearing a chunky knit under a blazer, the camera will only see a massive, undefined silhouette. If you want definition, make sure at least one layer has enough structure to hold its own shape.
- Don’t forget the hemline math. A hem that is just a fraction too long can make you look shorter and “heavy” in a photo because it cuts your legs off at the wrong point. If you have a pair of trousers that look great in person but weird in pictures, it’s probably a hem issue. A quick £10-£15 trip to the tailor to hit the right ankle bone can change your entire silhouette.
The Truth About the Lens
A camera doesn’t care about the brand name on your tag; it only cares about how the fabric hangs and where the seams pull. Stop trying to pose your way out of a bad fit and just find a tailor to fix the shoulder line—it’ll cost you less than a cocktail and look ten times more expensive in every single frame.
Neve Okonkwo-Barr
The Bottom Line
At the end of the day, looking good in a photo isn’t about owning a massive, trend-driven wardrobe or finding the perfect studio lighting. It’s about understanding how your clothes actually interact with your body and the lens. Remember: check your seam lines, mind your fabric weight so you don’t look like a shapeless blob, and for heaven’s sake, don’t ignore a poor fit just because the garment was on sale. If a piece looks amazing in the mirror but fails in the photo, it’s usually because the structure is weak or the proportions are off. Instead of scrolling through more shopping apps, take that piece to a tailor. A simple hem or a darted waist costs less than a fancy brunch and will do more for your digital presence than any new “must-have” item ever could.
Style isn’t a math problem you solve by spending more money; it’s a technical one you solve by paying attention. You don’t need a designer label to look intentional and sharp; you just need clothes that respect your silhouette and fabrics that hold their shape under a flash. Stop trying to buy your way into looking better and start working with what you have. When you prioritize fit and construction over fleeting trends, you stop being a victim of the algorithm and start looking like someone who actually knows what they’re doing. Now, go find that tailor and make what you own work for you.
Frequently Asked Questions
If I have a piece that looks great in person but looks "off" in photos, is it a lighting issue or is the garment actually poorly constructed?
It’s usually both, but start with the construction. If a garment has zero structural integrity—meaning the interfacing is paper-thin or the seams are pulling—no amount of golden hour light will save it. Lighting can hide a bad texture, but it can’t fix a shoulder seam that’s collapsing or a fabric that ripples unnaturally because it lacks weight. If it looks “off,” check the tension in the fabric; if it’s fighting the camera, it’s a construction problem.
How much should I actually spend on a tailor to make sure a piece looks expensive in a photo versus just looking "fitted"?
If you just want it to “fit,” a £15 hem is fine. But to make a piece look expensive on camera, you’re paying for structural integrity. Don’t just shorten the sleeves; ask them to taper the arm or adjust the shoulder slope. Expect to spend £40–£60 on things like waist suppression or darting. It sounds steep, but a £10 thrifted blazer with £50 of precision tailoring looks more “luxury” in a photo than a £500 designer piece that’s sagging at the wrong seam.
Are there specific fabrics that are a total nightmare for photography, or is it more about how the seams sit on my body?
It’s both, but the fabric is usually the culprit for the “why does this look cheap?” vibe. Thin, synthetic blends—think that shiny polyester from a fast-fashion site—reflect light like a disco ball and highlight every single wrinkle or undergarment line. If the fabric has no weight, it won’t hold its shape against the camera. However, if your seams are pulling or puckering at the hips, no amount of good lighting will save the silhouette.
