I spent two years in a basement studio pinning hems for a bridal shop, and if there is one thing those silk slips taught me, it’s that brands are lying to you. They want you to believe that “Size 10” is a universal truth, but we both know that’s a marketing myth designed to keep you clicking ‘buy’ on things that don’t actually fit. Most people approach online shopping with a sense of dread because they don’t actually know how to measure yourself properly, so they just guess and hope for the best. Guessing is how you end up with a “bargain” blazer that makes your shoulders look like they’re wearing cardboard, and trust me, the cost of returning it is never worth the headache.
I’m not here to give you some overcomplicated, academic guide that requires a professional mannequin and a degree in geometry. I’m going to show you how to grab a simple tape, find your real numbers, and understand the difference between a measurement that works and one that just looks good on paper. We are going to focus on the actual math of your body so you can stop wasting money on clothes that need a miracle and start buying pieces that actually belong in your wardrobe.
Stop Buying Sizes How to Measure Yourself Properly for Real Fit
First, throw your “Large” or “Size 10” labels in the bin. They are lies designed by marketing departments to make you feel like you’re failing a test, when really, the brand just has inconsistent patterns. If you want to actually know if a garment will work, you need your own accurate body dimensions for sizing. Grab a soft tailor’s tape—not a metal construction one, please, unless you want a bruised rib—and learn how to use a measuring tape without pulling it so tight you can’t breathe. You need ease, not a vacuum seal.
When you’re working through a body measurement guide for clothing, don’t just hover at the narrowest part of your waist and call it a day. If you’re looking at skirts or trousers, you absolutely have to know how to measure hips for dresses and pants by finding the widest point of your seat. If you skip that step, you’ll end up with a piece that fits your waist perfectly but refuses to go past your thighs. Measure twice, check the math, and stop letting a random number on a tag dictate your confidence.
The Tool and the Technique How to Use a Measuring Tape
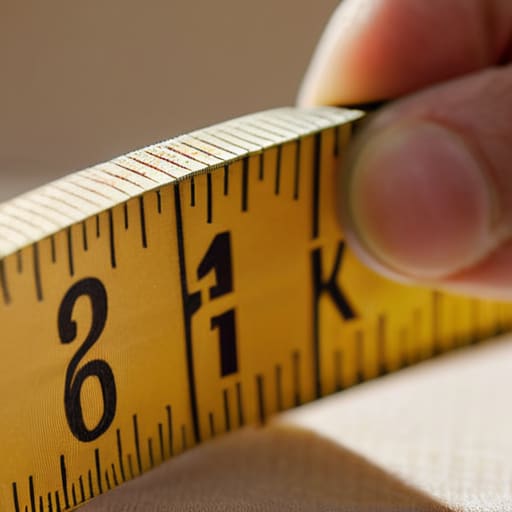
First things first: put down the metal construction tape you keep in the kitchen drawer. It’s useless for this. You need a flexible, soft tailor’s tape—the kind that can actually hug the curves of your body without digging in or skipping over a seam. If you’re trying to get accurate body dimensions for sizing, the tape needs to be snug but not “I can’t breathe” tight. If you pull it too hard, you’re measuring a version of yourself that doesn’t exist; if it’s too loose, you’re just measuring air.
When you’re learning how to use a measuring tape effectively, the golden rule is to keep it level. I see people all the time measuring their waist while the tape is sagging at the back, which completely ruins the math. For the bust, ensure the tape is parallel to the floor all the way around. When you’re figuring out how to measure hips for dresses, find the widest part of your seat—usually right across the fullness—and keep that tape steady. If you’re working alone, use a mirror to check that the tape hasn’t twisted into a diagonal line. Precision is everything when you’re trying to bypass a brand’s wonky size chart.
Mastering the Math Measuring Bust and Waist Correctly
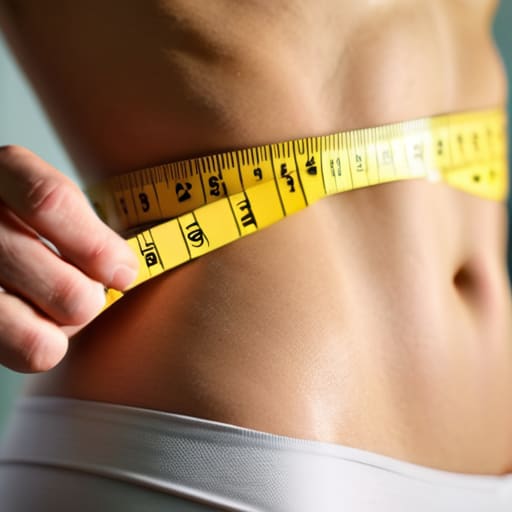
First, let’s tackle the bust, because this is where most people trip up and end up with a shirt that either acts like a corset or a tent. Don’t just wrap the tape around your chest and call it a day. You need to find the fullest part of your bust—usually right across the nipples—and ensure the tape is level all the way around your back. If the tape dips in the rear, your measurement is useless. When you’re measuring bust and waist correctly, keep the tape snug enough to stay put but not so tight that it indents your skin. If you’re squeezing your breath out to get a number, you’re lying to yourself, and that lie will cost you £40 in alterations later.
Next, the waist. This isn’t where your jeans sit; that’s your hips. Your natural waist is the narrowest part of your torso, usually right above your belly button. If you can’t find it, bend to the side—where your skin creases is your target. This body measurement guide for clothing only works if you treat your measurements as a baseline, not a final verdict. Once you have these two numbers, you can actually compare them to a real clothing size chart measurements instead of just praying a “Medium” fits your specific shape.
Your Body Measurement Guide for Clothing That Actually Lasts
Once you have the numbers, you need to stop treating them like abstract math and start seeing them as a blueprint. Most people look at a clothing size chart measurements and think, “I’m a size 10,” but that’s a lie told by brands to make their production lines easier. Your body doesn’t care about a label. To build a wardrobe that actually lasts, you need to keep a running log of your accurate body dimensions for sizing in a note on your phone. This isn’t just for when you’re shopping online; it’s for when you find a vintage gem at a charity shop and need to know instantly if the seam allowance can handle a bit of letting out.
When you’re building this guide, don’t just focus on the “standard” spots. If you’re looking at skirts or tailored trousers, knowing how to measure hips for dresses and pants is the difference between a garment that sits beautifully and one that pulls awkwardly at the pockets. I always tell my clients: if the fabric is a heavy wool or a rigid denim, these measurements are non-negotiable. You can’t “squeeze” into a structured fabric, but you can certainly tailor a garment to follow your lines if you know exactly where those lines are.
Beyond the Chart Getting Accurate Body Dimensions for Sizing
Here is the reality: even if you have the most accurate body dimensions for sizing, a standard clothing size chart is basically a work of fiction. Brands use these charts as a suggestion, not a rule, and they vary wildly between a high-street polyester blend and a heavy wool coat. If you rely solely on the numbers on a website, you’re going to end up with a garment that looks great on a mannequin but makes you feel like you’re wearing a cardboard box.
To get this right, you have to look at the relationship between your measurements and the fabric. When you are measuring bust and waist correctly, don’t just pull the tape tight like you’re trying to win a wrestling match. Leave a little breathing room—about the width of two fingers—so you can actually sit down without a seam screaming for mercy. This is especially vital when learning how to measure hips for dresses; if you measure too tight, you’ll buy a beautiful midi skirt that you can only wear while standing perfectly still. Use your numbers as a baseline, then adjust for the fabric’s soul.
5 Ways to Stop Messing Up Your Own Measurements
- Get a second pair of eyes. Measuring your own back or even your waist while looking in a mirror is a recipe for disaster because you’ll subconsciously pull the tape too tight or tilt your body to “fix” the shape. If you can’t grab a friend, use a piece of masking tape on the wall as a level, but seriously, ask someone to do it.
- Ditch the tight leggings. If you’re measuring yourself while wearing heavy denim or compression gear, your numbers are lies. Wear your thinnest underwear or a light camisole so the tape is actually touching your skin or the thinnest layer of fabric. You want the measurement of your body, not your gym gear.
- The “Two-Finger Rule” is your best friend. Never pull the tape until it’s digging into your skin—that’s how you end up with a shirt that won’t button. Slide two fingers under the tape at the widest part of your bust or hips; if they fit comfortably, you’ve found the sweet spot between “too tight” and “baggy.”
- Breathe normally. I see people holding their breath to get a smaller waist measurement all the time, and then they can’t actually sit down in the trousers they just bought. Measure while standing naturally, exhaling normally. If you can’t breathe in the clothes, the measurement is useless.
- Ignore the “Size” and look at the “Inches.” Brands are inconsistent; a Size 12 in one shop is a Size 8 in another. When you’re looking at a size guide online, stop looking at the letters and start looking at the raw numbers. If the waist says 30 inches and you measured 31, that garment is a “no” unless you’re prepared to pay a tailor to let it out—which, spoiler alert, is often impossible.
## Stop Trusting the Label
“A size 10 is a marketing lie, not a physical reality. If you want clothes that actually sit on your frame instead of fighting it, stop looking at the number on the tag and start looking at the actual inches; you can’t tailor a number, but you can definitely tailor a measurement.”
Neve Okonkwo-Barr
The Math is Done, Now Go Use It
Look, once you have these numbers written down, you have officially done more for your wardrobe than 90% of people shopping online right now. You’ve moved past the nonsense of “Small, Medium, Large” and actually understood that your body doesn’t care what a label says; it only cares about seam placement and fabric volume. Remember that a measurement is just a starting point. If you find a vintage blazer with a gorgeous wool weight but the bust is two inches too tight, don’t walk away. Check the seam allowance first. If there is enough fabric inside to let it out, that’s a win. If not, you know exactly why it won’t work before you waste your money.
At the end of the day, I want you to stop apologizing to your clothes. We spend so much time trying to squeeze into a specific size because we think that’s what “style” looks like, but style is actually just the absence of friction. When your clothes actually hit your shoulders where they should and your waist sits where it belongs, you stop fidgeting and start living. Don’t let a brand’s sizing chart dictate your confidence. Use your measurements, find the pieces that respect your shape, and remember that the perfect fit is usually a combination of a good find and a quick trip to the tailor.
Frequently Asked Questions
What do I do if my measurements are somewhere between two sizes on the size chart?
Always size up. Seriously. It is much cheaper to pay a tailor £15 to take in a waist that’s slightly too big than it is to pay them £40 to try and “let out” a seam that doesn’t have the extra fabric. Most fast fashion doesn’t leave you any seam allowance to work with, so you’re stuck. Buy the larger size so the garment drapes properly, then nip it in. That’s how you get a custom fit on a budget.
Should I be measuring myself while wearing my usual clothes or just in my underwear?
Go with the underwear option, but with a caveat. If you measure over a chunky knit sweater, you’re essentially buying a size too big, and no amount of tailoring can fix a garment that’s fundamentally too voluminous. Measure on bare skin or very thin base layers to get your true dimensions. Once you have those “naked” numbers, you can compare them to the brand’s size guide. That’s how you avoid the “it fits but feels huge” trap.
If I'm measuring a piece of clothing I already love instead of my body, how do I make sure the math translates to a new purchase?
Lay the piece flat—I mean completely flat, no bunching—and measure from seam to seam. If you’re measuring a chest width of 20 inches, double it to 40 for the total circumference. But here’s the catch: don’t just match the numbers. Check the fabric. A 40-inch stretchy jersey top is not the same as a 40-inch stiff linen shirt. Always leave a little “ease” in your math, or you’ll be back at my sewing machine by Tuesday.
