Stop treating a loose thread like a death sentence for your favorite sweater. Most people see a small hole or a popped seam and immediately think, “Well, that’s it, time to go spend sixty quid on a replacement.” That is exactly what the fast-fashion machine wants you to do, but it’s a lie. I spent my formative years watching my grandmother turn “unwearable” hand-me-downs into masterpieces just by understanding how a needle moves through a specific weave. This isn’t about being a master seamstress; it’s about realizing that a tiny bit of thread is often the only thing standing between you and a functional wardrobe. This complete guide to mending isn’t going to teach you how to sew a Victorian corset, but it will give you the actual, tactile skills needed to stop your clothes from falling apart at the seams.
I’m stripping away the intimidating jargon and the “Pinterest-perfect” illusions to give you the honest truth. We are going to cover the high-impact fixes—the ones that actually save you money—from darning a heel to reinforcing a button that’s seen better days. You’ll learn which fabrics are worth the effort and which ones are just lost causes. This is the math-backed way to make your clothes last another three years instead of three weeks.
Guide Overview
Tools & Supplies
- Hand sewing needles (various sizes)
- Fabric scissors (sharp edge)
- Seam ripper (for removing old stitches)
- Embroidery hoop (to keep fabric taut)
- All-purpose thread (3-5 assorted colors)
- Fabric scraps (for patching)
- Sewing pins (small pack)
- Measuring tape (1 piece)
Step-by-Step Instructions
- 1. First, you need to stop and perform a fabric autopsy. Don’t just look at the hole; look at the edges. If the fabric is fraying wildly, it’s a sign the fibers are tired or the weave is loose, which means a simple patch won’t hold. If it’s a clean tear in a sturdy cotton, you’re in luck. If it’s a delicate silk or a high-stretch jersey, you’re going to need a different set of tools than if you were fixing a pair of heavy denim jeans.
- 2. Gather your supplies, but please, don’t buy a massive, overpriced sewing kit from a big-box retailer that comes with fifty types of thread you’ll never use. You only need three things to start: decent quality hand-sewing needles (get a variety of sizes), a small pair of sharp embroidery scissors, and thread that actually matches the weight of your garment. If you try to fix a lightweight linen shirt with heavy-duty polyester thread meant for upholstery, you’re going to end up with puckered seams that look like a topographical map.
- 3. For small holes or “runs” in knitwear, you’re going to want to use the darning method. Think of this as weaving a new piece of fabric into the old one. You aren’t just sewing a line; you are creating a structural grid. Use your needle to create vertical threads across the hole, then weave your horizontal threads through them. It takes a bit of patience, but it’s the only way to ensure the hole doesn’t just expand into a crater the next time you sit down.
- 4. If you’re dealing with a structural failure—like a seam that has popped or a hem that’s unravelling—you need to reinforce the edge. I always tell my clients that a seam is the skeleton of the garment. If the skeleton is broken, the whole thing collapses. Turn the garment inside out, align the edges perfectly (use pins if you have them, or even a couple of safety pins to hold the tension), and use a backstitch. It’s stronger than a running stitch and will actually stand up to the stress of you moving your body.
- 5. When it comes to patches, stop thinking about them as “fixes” and start thinking about them as intentional design choices. If you have a hole in your favorite jeans, don’t try to hide it with a patch that’s almost the same color but slightly off; it looks accidental and messy. Instead, go for a high-contrast fabric or a textured scrap. A well-placed patch can actually make a garment look more expensive and curated than it did when it was brand new, provided you aren’t just slapping a piece of felt on it.
- 6. Finally, do the stress test before you put the garment back in your rotation. Put the item on, sit down, reach for something on a high shelf, and move around. If you feel the thread pulling or see the fabric straining at your repair, it’s not done. It is much cheaper to spend another twenty minutes re-stitching a seam now than it is to replace a shirt because a DIY repair failed in the middle of a meeting.
Understanding Complete Guide to Mending
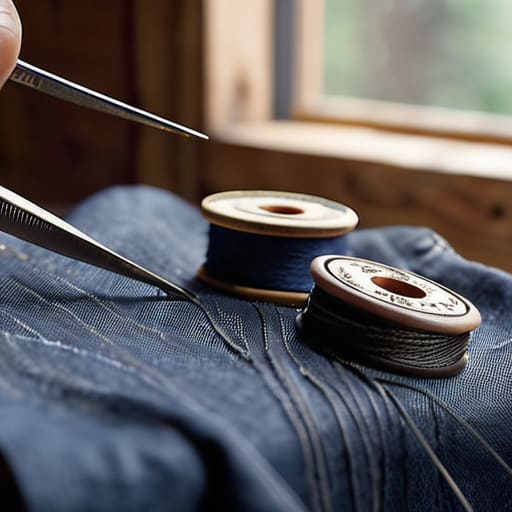
Before you even pick up a needle, you need to understand that mending isn’t just about patching a hole; it’s about reading the fabric’s DNA. I spent two years in a basement studio watching people try to fix heavy denim with flimsy polyester thread, and let me tell you, it’s a disaster waiting to happen. If you want your repairs to actually hold, your essential sewing kit for repairs needs to match the weight of the garment. Using a fine silk thread on a heavy canvas work jacket is like trying to staple a sheet of plywood; it’s going to snap the moment you move.
There is also a massive psychological shift you have to make. You can either aim for a seamless repair that tries to hide the damage, or you can lean into visible mending aesthetics where the repair becomes a deliberate design choice. I’m a huge fan of the latter. Instead of fighting a losing battle to make a tear invisible, use a contrasting thread color to turn that hole into a feature. It’s much more satisfying than a messy, rushed job that ends up looking like a surgical scar.
Key Things to Know
Before you dive in, let’s get one thing straight: mending isn’t just about hiding a mistake; it’s about deciding if the garment is worth the effort. I always tell my clients to check the fiber content first. If you’re trying to patch a 100% polyester fast-fashion top, the fabric might just shred further under your needle. However, if it’s a heavy cotton or a sturdy wool, you’re golden. Building an essential sewing kit for repairs is your first real step—and no, a tiny travel kit with one dull needle won’t cut it. You need decent shears, a variety of thread weights, and actual seam rippers, not those plastic things that snap if you look at them wrong.
Also, stop worrying about making the repair invisible. Unless you’re working on a formal silk slip, perfection is a lie. I’m a huge advocate for visible mending aesthetics, where you use a contrasting thread color to turn a hole into a design feature. It’s much more satisfying to have a sweater with a deliberate, beautiful patch than one with a messy, “I tried to hide this” knot. Just remember: the goal is structural integrity, not a magic trick.
5 Things I Wish People Knew Before They Picked Up a Needle
- Stop treating a hole like a death sentence. If it’s a clean rip in a natural fiber like cotton or linen, you can often stabilize it with a bit of interfacing and a tight stitch. If you try to “fix” a synthetic blend with a massive, messy patch, you’re just turning a repair into a permanent mistake that looks like a cry for help.
- Match your thread weight to the fabric, or don’t bother. I see people trying to sew heavy denim with thin silk thread all the time—it snaps the second you sit down. Conversely, using thick upholstery thread on a lightweight blouse makes the seam look like a scar. If the thread is more obvious than the repair, you’ve failed the math.
- Learn the difference between a “fix” and a “feature.” Sometimes, a visible mend—like a sashiko stitch or a contrasting patch—is better than trying to hide a repair that will never look seamless. If you can’t make the seam disappear, make it look intentional. It’s better to have a cool, textured patch than a lumpy, poorly sewn-together mess.
- Don’t ignore the “stress points” when you’re mending. If you’re fixing a seam that pulls at the hip or the crotch, you can’t just sew the two edges together and call it a day; that tension will just rip the new stitches right out. You need to reinforce the area with a bit of extra fabric or a stay-stitch to distribute the weight.
- Check your tension before you commit. There is nothing more soul-crushing than spending forty minutes meticulously mending a sweater only to realize your machine tension was so tight it puckered the entire garment. Do a test scrap first. It takes thirty seconds and saves you from a garment that looks like it’s been through a paper shredder.
The Real Cost of a Hole
“A loose thread or a tiny snag isn’t a reason to bin a garment; it’s just a math problem. If you spend forty pounds on a sweater and toss it because of one hole, you’ve wasted forty pounds. If you spend five pounds on some matching thread and ten minutes of your time, you’ve just saved thirty-five and kept a good piece of fabric out of a landfill.”
Neve Okonkwo-Barr
The Bottom Line on Mending
At the end of the day, mending isn’t about being a master seamstress or having a studio full of expensive equipment; it’s about knowing when to stop and think before you toss something in the bin. We’ve covered the essentials—from identifying the right needle for your fabric weight to understanding that a simple darn can save a sweater that costs more than your weekly grocery shop. Remember, the goal isn’t perfection; it’s about extending the life of what you already own. If you can master a basic running stitch or learn how to reinforce a loose seam, you have already won half the battle against a wardrobe that feels broken. It is much cheaper to fix a snag than it is to replace a whole garment, and the math always favors the repair.
I want you to stop looking at a hole in your favorite trousers as a reason to shop for a replacement. Instead, look at it as a chance to make that piece even more yours. There is a specific kind of confidence that comes from wearing a coat that has been patched and loved, rather than something brand new that feels anonymous. When you mend, you are reclaiming your agency from a fashion industry that profits off your perceived flaws. You aren’t just fixing a seam; you are building a wardrobe that actually lasts. So, grab a needle, find some matching thread, and give your clothes a second chance. Your bank account—and your sense of style—will thank you.
Frequently Asked Questions
At what point does a tear actually become "unfixable" versus just too expensive to bother with?
Look, there’s a difference between a repair and a reconstruction. If you’ve got a clean rip in a seam or a small hole in a stable fabric like denim, fix it. If the fabric is disintegrating—like those tiny, spiderweb holes in cheap, thin knits—run. Once the structural integrity is gone, you’re paying more for the labor than the garment is worth. If the repair costs more than a new, better-quality version, let it go.
If I’m mending something with a lot of stretch, like leggings or a knit sweater, will my stitches just pop the second I put them on?
If you use a standard straight stitch on a knit, it will snap. It’s not a matter of if, but when. You’ll be halfway through a coffee and—pop—there goes your repair. For anything with stretch, you need a zigzag stitch or a stretch stitch. It allows the thread to move with the fabric instead of fighting it. If you don’t have a machine, use a needle and thread with a slightly looser tension. Don’t fight the stretch; work with it.
How do I know if I should try to fix a hole myself or if I should just take it to a professional and pay for a proper patch?
Look, check the fabric first. If it’s a tiny snag in a sturdy cotton tee or a small hole in denim, grab a needle and some matching thread—you can DIY that for zero pounds. But if it’s a gaping hole in silk, a fraying seam on a wool coat, or anything structured like a blazer, stop. Don’t butcher it. A professional patch or darning job might cost you £15–£25, but that’s cheaper than replacing the whole garment.
